
What to Check in Windows Sound Settings
A panel-by-panel check that ends with a real-field dictation test.
 Voiskey Team
Open the Correct Sound Panel
What to Check in a desktop sound panel begins with opening the right panel, because two similar screens expose different switches. The modern settings app lists input and output devices and a master permission toggle, while the older control panel exposes levels, enhancements, and advanced formats. Open the modern page first to confirm the device and the master switch, then open the older panel for level and format details. Note which screen you used for each change. When a fix involves two screens, a note that names both prevents confusion later. Keep one screenshot of each panel so a colleague can see which exact build you used.
Confirm the panel is showing the recording side, not playback. A common mistake is adjusting the speaker volume while the microphone stays muted. Look for the recording or input heading, then find the list of devices with a level indicator. Select the device you speak into and watch the indicator while you talk. If the page shows only output devices, switch sections before concluding that the microphone is missing. A minute spent confirming the section saves a long detour through unrelated settings. If the panel lists no input devices at all, the driver or the port is the next suspect, not the app that failed to dictate.
Check the master access switch before individual app entries. The modern page usually has a single control that allows apps to use the microphone, with a per-app list below it. If the master switch is off, every app fails even when its own entry looks correct. Turn it on, then review the list. If the master switch is managed by an organization and cannot be changed, record that fact and move to the comparison test rather than fighting the toggle. Knowing which layer blocks you changes the next step. Write the master switch state in your note, because it is the first thing to check when every app fails at once.
Write down the panel path you used. Different builds of the same system place the recording list in slightly different menus, and a colleague on another build may not find the same item. Use the search box in settings and type microphone to reach the page quickly. Note the exact page title and the names of the sections you changed. A path that another person can follow is worth more than a memory of clicking around until something worked. Save the path as a short set of steps rather than a general description, and test the whole path on a second machine before you share it.
Choose One Default Recording Device
Choose one default recording device and commit to it for the test. The list may contain a headset, a webcam microphone, a dock input, and a virtual device from a calling tool. Select the one you actually speak into, set it as the default, and confirm the selection survives a reconnect. If the system changes the default when a headset connects, note that behavior. Then speak one sentence and watch the level beside the chosen device. A stable default is the foundation for every later comparison. A default that changes after every reconnect tells you the system prefers the newest device, so plan your tests around that habit.
Remove or disable devices you do not use. A disconnected headset that remains selected produces silence that looks like a software fault. If the panel allows you to disable an entry, do so, then confirm the default again. If it does not, keep a note of the entries to ignore. Test after every change, because disabling a device can shift the default to another entry without warning. A short list of active devices is easier to reason about than a long list of names from old meetings. Keep the disabled entries in a list of their own so you can restore one quickly if a call needs it.
Test each candidate device with the same sentence. Speak into the built-in microphone, then into the headset, and compare the meter and the text you get from a dictation tool. Keep the distance and the room as similar as you can. If one device is much weaker, decide whether it is worth keeping for calls only. Write the result beside the device name. A ranked list of working devices lets you switch quickly when a headset fails during a busy day. Rank the devices in a short table with the room and the distance noted, since a result without conditions is hard to compare later.
Check ports and adapters before you settle. A dock may expose a microphone under a different name, and a monitor may add an input you did not expect. Unplug one accessory at a time and watch the list change. When you find the entry that corresponds to your microphone, rename it if the panel allows, so the name is recognizable next month. Record the port and the name together. Clear naming prevents the next person from selecting the wrong entry during a test. If renaming is not possible, draw a small map of the ports and the names they expose, and keep it near the desk.
Adjust Level and Disable Extras
Set the level with your normal voice and keep it there. Select the device, open its properties, and watch the meter while you read a sentence. Aim for strong movement without the bar pinned at the top. If the panel offers a boost, use it only after trying a normal level, because a boost also raises background noise. Write the value beside the device name. Test the level where you actually work, since an open office needs a different setting from a closed room. Read the sentence twice at the same volume and keep the higher of the two readings, because the first pass often starts quietly.
Review enhancements one at a time. Noise suppression, echo cancellation, and automatic gain can help a call and can also clip quiet syllables in dictation. Turn one option off, dictate the same sentence, and compare the text rather than only the meter. Keep the setting that produces the cleaner result. If you cannot hear or read a difference, leave the options at their defaults and change only the level. Recording which options were on when the text was clean saves a later argument. Write down the option settings as a small table with on and off columns, so a later test can reproduce the exact combination.
Check the advanced format if the panel exposes it. Some devices offer several sample rates and bit depths, and a mismatched format can cause dropouts in one app while another works. Note the current format before changing it. Try the default first, then test one alternative with the same sentence. If neither helps, return to the original value so you do not leave an unexplained change behind. Format changes are easy to forget and hard to diagnose later, so they belong in your notes. A format change that helps one app often hurts another, so note which app you tested and keep the default for everything else.
Look for exclusive-mode settings that let one app hold the device. A calling tool that keeps the microphone open can leave a dictation app with silence until the call ends. If the panel offers a choice, test with exclusive mode off and confirm that two apps can share the device. Do not leave this change untested; a setting that breaks calls is worse than the problem you started with. Record the choice and the reason in the same note as the level. Test a short call and a short dictation in the same minute, because the second failure often appears only when both tools run together.
Verify With Voiskey in a Real Field
Verify the setup in a real text field rather than only in the sound panel. Open a plain editor, place the cursor, and dictate the sentence that failed. If text appears, the device and level are working. Then test the app that originally failed. If that app still produces nothing while the plain editor works, the problem is app-level and not device-level. That split is the most useful result of the whole check, because it tells you which support path to follow. Choose the sentence you will use for every later test and keep it short enough to speak without reading from a long script.
Use Voiskey as the system-level comparison. Voiskey is a voice typing app for macOS and Windows: press a shortcut, speak, and text appears at the insertion point in any app or text field. Open a plain document, dictate the control sentence, and read the result. If Voiskey returns clean text, the recording device and level are confirmed and the failing app is the remaining suspect. Keep the result beside the panel note so the evidence stays together. Keep the failing app open beside the plain editor so you can switch between them in one second and compare the two results while both are fresh.
Download Voiskey from the official site if it is not installed, and finish the setup before testing. Sign in, confirm the shortcut starts a listening state, and repeat the plain-field dictation. Because the app works at the system level, it needs no microphone button inside the other app and no separate app permission beyond the system prompt. That makes it a dependable control when a single app refuses to cooperate. Record the version and shortcut in your checklist. Record the exact version number of the app you installed along with the shortcut, because a later update may change where the setting lives.
Interpret the comparison without overreaching. If both the plain editor and the failing app produce clean text, the original fault was probably a device switch or a prompt that has since cleared. If the plain editor works and the app does not, focus on that app. If neither works, return to the recording device and the level. Write one sentence for each case you observed. A short, specific conclusion is easier to act on than a list of everything you changed. If both results are clean, stop testing and write the final conclusion, because extra checks now only add noise to a settled question.
Save a Repeatable Setup Checklist
Turn the working setup into a checklist with named values. List the device name, port, default state, level, enhancement settings, format, exclusive-mode choice, and the shortcut you use. Add the system version and the date. Keep the checklist where the team stores operating notes. A colleague should be able to follow it without asking which panel you meant. If a step says check the sound settings, rewrite it with the exact page and section title. Write the values in the order you would check them, starting with the device name and ending with the shortcut, so the reader can follow the same path you did.
Recheck after updates and hardware changes. System updates can reset the default device, and a new dock can add inputs that confuse the list. Once a month, dictate one sentence in a plain field and one in the app you use most. Compare the result to the checklist and update any value that moved. Put the task on a shared calendar with an owner. This small routine catches the silent regressions that otherwise appear at the worst moment. A checklist that fits on one single page is more likely to be used than a long document nobody opens during a busy afternoon.
Standardize the words your team uses. Add names, acronyms, and product terms to the app so they are recognized, and keep the list beside the checklist. Voiskey learns names, jargon, acronyms, and spelling preferences, and the team plan offers shared vocabulary and workflows for groups using the same terms. Review the list when a new product name appears. Consistent terms reduce corrections and make it easier to compare results between colleagues. Review the list when a new product name appears and remove terms the team no longer uses, so the shared set stays small and accurate. A small set is easier to learn.
Finish by choosing the daily path. For most teams, a system-level app that types wherever the cursor sits is more stable than a feature tied to one page or one calling tool. Download Voiskey for your desktop, set the shortcut, and dictate one real message in the field you use most. Keep the checklist for the cases where a device or an app misbehaves. Follow Speak, Polish, Type, Edit: speak the draft, let the app polish it, accept the text, then edit what needs judgment. Keep the checklist within reach for the first week, then file it where the team looks for operating notes.
FAQ s
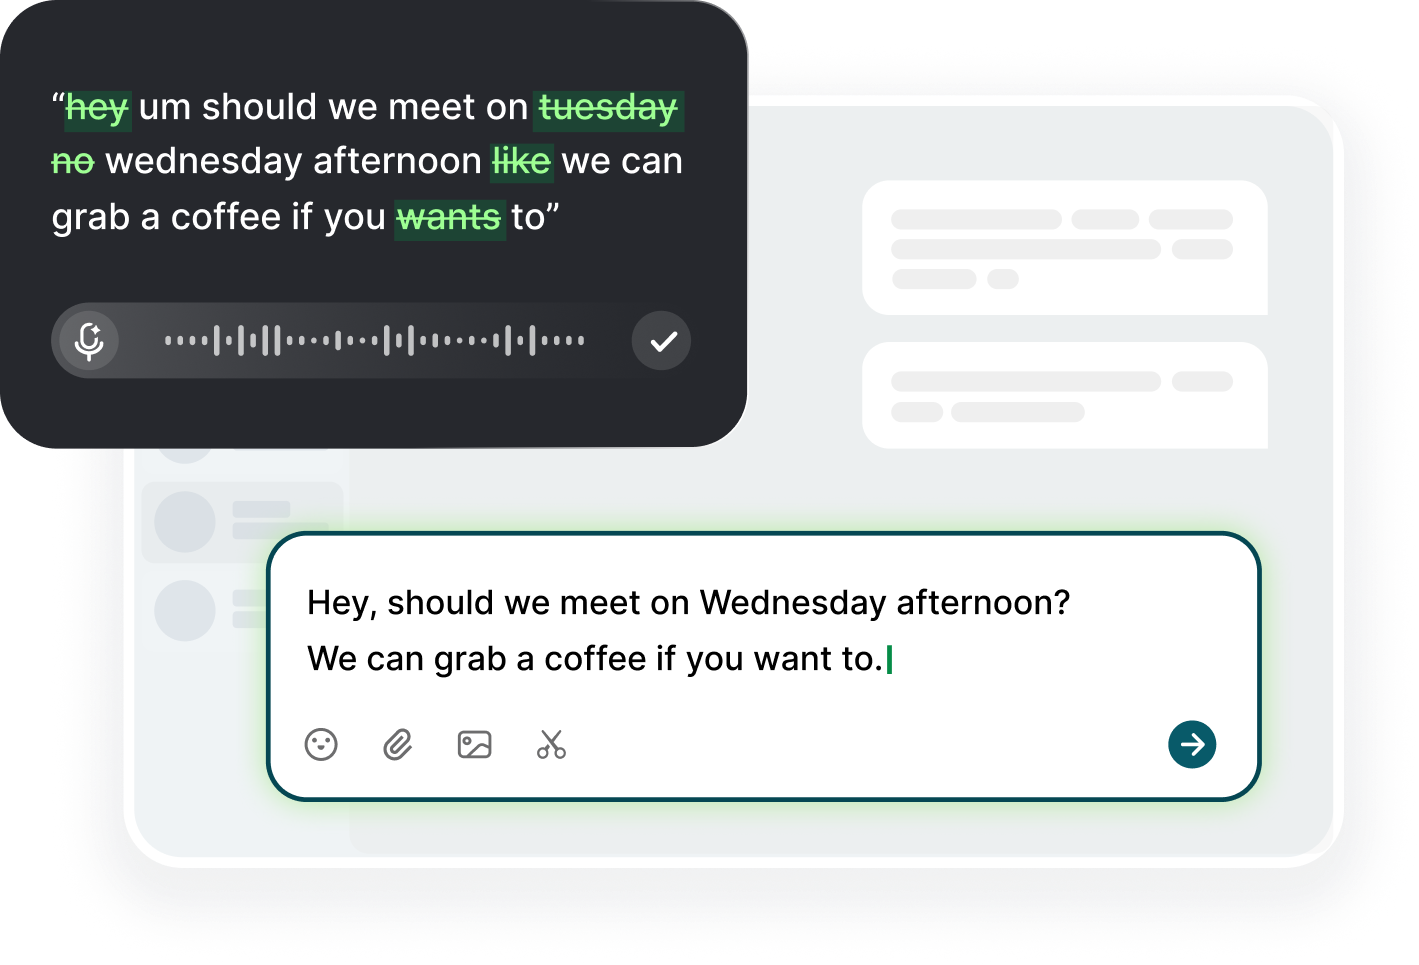
Voiskey works at the system level: press the shortcut, speak, and text appears at the insertion point in any app or text field. It uses the recording device your system provides, so confirm a moving level before you dictate. Then the app removes filler words, stutters, false starts, self-corrections, and grammar slips and adapts punctuation and tone to the task.
A short dictation in a plain field shows whether the new default actually delivers speech. Voiskey places text at the insertion point in any app or text field, so the test does not depend on a page button. If the result is clean, the device switch worked; if phrases are missing, revisit the level and the device properties before testing the failing app again.
Voiskey is system-level and places text at the insertion point in any app or text field once the shortcut is pressed and you speak. It does not require a microphone button inside the app you are using. If another tool is holding the recording device, close or release it first, then test Voiskey in a plain field to confirm the device is available.
Record the device name, level, enhancement choices, and shortcut, then add a date and an owner. Voiskey learns names, jargon, acronyms, and spelling preferences, and the team plan offers shared vocabulary and workflows, so list the terms you add as well. Recheck the checklist after major updates. A one-page record that a colleague can follow is more useful than a long description.


 Voiskey
Your voice, amplified.
Download Voiskey for Mac and Windows and dictate clean text with a steady input level.
Use it across macOS, Windows, iOS, and Android