
How Microphone Gain Affects Accuracy
A measured way to tune microphone gain and keep accuracy stable
 Voiskey Team
Baseline the Input Level
Understanding How Microphone Gain Affects Accuracy begins with one honest measurement of the level your microphone actually delivers. Open the input meter in your operating system settings and read a normal sentence at your normal distance. Watch the meter, not the transcript. A level that touches the top of the scale means the signal is pressed harder than the input can hold, while a level that barely moves means quiet syllables fade before recognition starts. Record the peak you see, the distance you used, and the room you sat in. Repeat the reading three times and keep the notes together. That small table is a better starting point than advice to speak louder or replace hardware.
Run the same sentence at three distances: close to the grille, at your usual working position, and about an arm's length away. Note the peak for each attempt and mark where the meter stops responding to further volume changes. Most people discover that their normal position already runs hot because the microphone sits near a keyboard, a fan, or a monitor speaker. Write a short description of the setup next to each number, including anything that hums or clicks in the room. These notes turn a vague complaint about poor accuracy into a specific condition you can reproduce, compare, and fix without guessing. Keep the anchor phrase identical so the only variable is distance.
Choose one anchor phrase of roughly twenty syllables and use it for every comparison in this project. Read it at a relaxed pace, then at a quick pace, and note whether the peak changes more than the quiet sections do. A gain setting that suits slow speech often overshoots when you speed up, because faster speech carries sharper transients. Save three meter readings taken under identical conditions, or three short recordings if your system allows it. Label each one with the date, the gain value, and the distance. From this point onward, every adjustment should be judged against the anchor phrase and the same physical position.
Decide what a good level looks like before you touch any control. Write down a target range, the fastest acceptable pace, and the quietest acceptable voice, then test all three together. If your notes show the level crossing the ceiling during the quick reading, fix that first. If the quiet reading disappears into the floor, fix that next rather than splitting your attention. Do not adjust gain and distance at the same time, because you will not know which change produced the result. Keep a copy of the original reading so later claims can be checked. The deliverable is a one-page baseline, not a stronger opinion.
Spot Clipping and Floor Noise
Two failure shapes dominate microphone problems, and they look completely different in the transcript. Clipping makes loud syllables collapse into a single blurred sound, so shouted words or plosives lose their edges while quiet words survive. Floor noise works the other way: the input level sits so low that the recognizer fills gaps with plausible but wrong words, or drops short words entirely. Listen for the pattern rather than judging one sentence. If errors cluster on loud moments, suspect the ceiling. If errors cluster on soft moments and trailing syllables, suspect the floor. That first split decides whether you lower gain, raise it, or change the physical position of the microphone.
Test the ceiling deliberately by speaking one sentence with extra emphasis on the first syllable of each word. Clipping reveals itself as repeated truncation on those stressed sounds, and the meter will flatten against its top value instead of bouncing. Then test the floor by speaking at the volume you would use late at night with a sleeping child nearby. If the meter barely lifts and the transcript starts inventing words, the input is underpowered for that situation. Write both results on the same sheet as the baseline. A setting that passes only the calm reading is not a general setting; it is a setting for one narrow condition.
Watch for proximity effects that mimic gain problems. Moving a headset boom closer raises the level without touching any control, and speaking directly into a laptop lid can create reflections that sharpen consonants into clicks. Try the anchor phrase at the same gain while varying only the angle of the microphone. If the peak jumps when you turn your head, the real problem is placement rather than gain. Note the angle and distance that produce the steadiest reading. Fix placement first, document it, and only then reach for software controls. Teams often spend days adjusting software while the physical setup changes between tests, which makes every reading incomparable.
Listen with the transcript closed and describe what you hear in plain terms: boomy, thin, hissy, crackling, or distant. Then read the transcript and compare the two impressions. A boomy input usually pairs with clipped vowels, while a thin input pairs with dropped endings. Note any room noise that arrives at the same moment as an error, such as a fan spinning up or a chair creaking. This cross-check separates microphone behavior from the language model's guesses. If your description and the error pattern disagree, repeat the anchor phrase once more before drawing a conclusion. A single pass is not evidence, and two consistent passes are usually enough to act on.
Tune With a Fixed Test
Change one control at a time and record the value after each step. Start from the baseline, lower the input level by small increments until the quick-reading peak stops flattening, and test the anchor phrase after every change. If the quiet reading degrades before the loud one improves, you have passed the useful range, so step back one increment. Write the value next to the observed result so the next person can repeat the sequence. Resist the urge to compensate with a different speaking volume, because that hides the problem rather than solving it. The test is complete when both the loud and quiet readings stay inside the target you defined earlier.
Ask a colleague with a different voice to read the same anchor phrase at the same position and gain. Voices differ in pitch and projection, so a setting tuned to one speaker can push another into clipping or into the noise floor. Record both sets of readings on the same sheet and mark which voice produced which peak. If the two results sit far apart, prefer the setting that keeps both acceptable rather than the one that is perfect for you alone. This step matters for shared desks, recording rooms, and any team that rotates equipment. A narrow personal setting becomes a recurring support request the moment someone else sits down.
Test with the background conditions you actually face, one source at a time. Add a fan, then a nearby conversation, then traffic through a window, and repeat the anchor phrase after each addition. Note whether the meter rises because the room is louder or because you unconsciously speak up to compete. If the latter, the gain setting is fine but the distance has drifted. Write the condition beside each reading so the comparison stays honest. Do not combine three noise sources in one pass, because you will not know which one caused the failure. The output of this stage is a short matrix of conditions and results that any teammate can read.
Freeze the winning configuration and describe it in operational language rather than numbers alone. Write down the gain value, the distance, the microphone angle, and the conditions the setting was tested under. Add a note about what to do when the room changes, such as moving closer or lowering the level before a call. Keep the anchor phrase and the original baseline in the same folder. If a later session sounds worse, repeat the exact test before changing anything, because a loose cable or a different seat can shift the result. A frozen configuration with a written test is maintainable; a remembered setting is a future argument.
Rebuild the Input Path With Voiskey
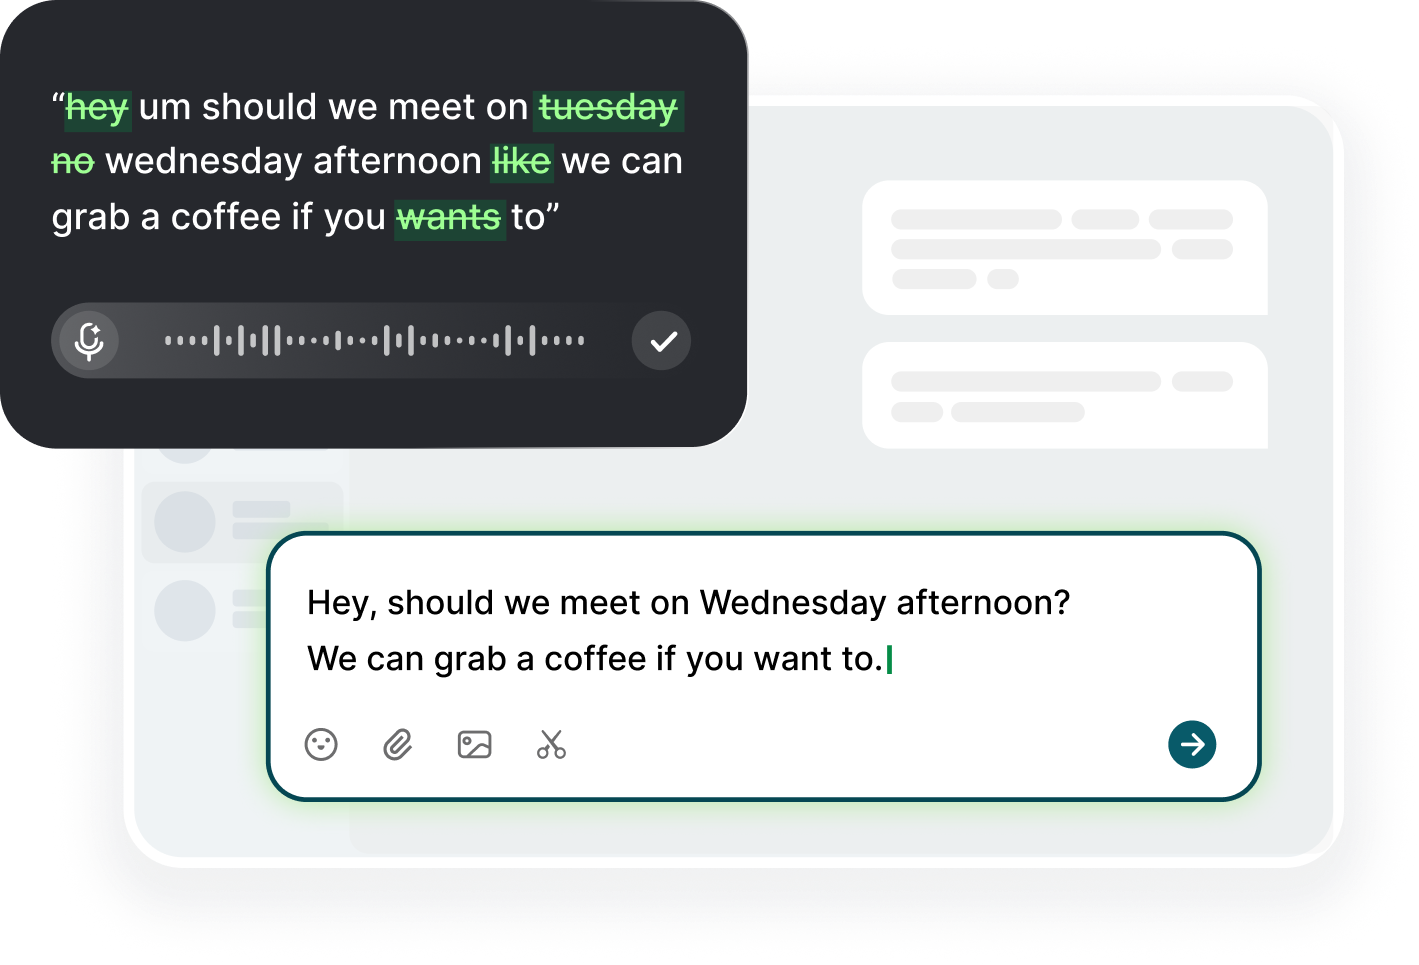
With the microphone settled, shift attention to the path between your voice and the text. Voiskey is an AI voice typing app for macOS and Windows that works at the system level: you press a shortcut, speak, and text appears at the insertion point in any app or text field. Because it sits above individual applications, a clean input level benefits every window you use rather than one narrow field. Download Voiskey, install it, and run the anchor phrase into a scratch document to confirm that the tuned setup behaves the same way inside the tool. Compare the result with your baseline sheet before changing any other variable.
Use the polish stage as a second opinion on your gain work. Voiskey removes filler words, stutters, false starts, self-corrections, and grammar slips, so a steady input level leaves it with cleaner material and fewer guesses. If the polished text still shows dropped endings on quiet syllables, return to the level test rather than adding more words to compensate. Speak a paragraph that includes names, acronyms, and one number, then read the result carefully. Voiskey learns names, jargon, acronyms, and spelling preferences, so repeated corrections should shrink over a few passes. Keep the raw attempt and the polished version side by side while you judge the setup.
Test across the places you actually type instead of a single scratch page. Dictate into your drafting app, your message window, and a code editor, because each field handles line breaks, punctuation, and spacing differently. The system-level shortcut should place text wherever the cursor sits, and the Speak-Polish-Type-Edit loop should feel the same in all three. Note any field that changes spacing or strips a line break, and add that observation to your notes rather than to a support ticket. If one field behaves badly while the others are fine, the microphone setting is probably not the cause, and you can stop adjusting gain.
Finish with a short acceptance pass that mirrors your original criteria. Read the anchor phrase, a paragraph of ordinary prose, and one list of steps, then check that loud syllables stay intact and quiet ones survive. Record the gain value, the tool version, and the date on the same sheet as the baseline. Ask one other person to repeat the pass without coaching, and if they reach a different verdict, treat that as a missing condition in your notes. Keep the sheet where the team stores operating instructions. When something drifts weeks later, the acceptance pass tells you whether the microphone changed or the workflow did.
Keep a Gain Log for the Long Run
A gain log turns a one-time fix into a routine that survives hardware swaps and desk moves. Record the date, the machine or headset used, the gain value, the distance, and the result of the anchor phrase on each entry. Add a short note whenever the physical setup changes, such as a new monitor, a shared desk, or a move to a quieter floor. Review the log monthly and after any complaint about accuracy. When a pattern appears, such as repeated clipping after a hardware change, you can correct the cause directly instead of retuning everything from scratch. Download Voiskey updates on the same schedule so the tool and the log stay in step.
Write a restart procedure that anyone can follow without you. List the three checks in order: confirm the correct input device, read the anchor phrase, compare the peak with the target range. Then add two recovery actions: lower the level one step if the meter flattens, and move closer if the quiet reading disappears. Keep the procedure to one page and store it beside the log. Test it on a colleague who has never tuned a microphone. If they hesitate, rewrite the step that caused the pause. A procedure that depends on tribal knowledge fails exactly when the person who wrote it is unavailable.
Pair the log with periodic rechecks of the words the tool tends to miss. Keep a short list of names, product terms, and abbreviations that appear often in your work, and read them aloud during each monthly check. Voiskey learns names, jargon, acronyms, and spelling preferences, so the list doubles as a record of what has already been taught and what still fails. If a term regresses, compare the current gain reading with the entry from the last good pass before assuming the vocabulary changed. This habit keeps two variables separate: the input level and the language model's prior knowledge.
Close the loop with a simple review question: did the last month produce more corrections than the month before? If yes, open the log, find the most recent change, and repeat the anchor phrase under the old conditions. If no, leave the configuration alone and avoid tweaking it for novelty. Share the review with anyone who uses the same desk or device, because a silent adjustment by one person becomes a mystery for everyone else. Archive old entries rather than deleting them, so a recurring seasonal problem remains visible. The log is working when a new teammate can read it and predict how the setup will behave.
FAQ s
Voiskey works with the signal your microphone sends, so a level that clips loud syllables limits what any polish step can do. Lower the input level, repeat a fixed test phrase, and keep the setting where stressed sounds stay clean. Voiskey then removes filler words, stutters, false starts, and grammar slips from the steady result it receives.
No tool can restore syllables that never reached the microphone, so raise the input level before blaming the typing app. Once the level is stable, Voiskey cleans up filler words, stutters, self-corrections, and grammar slips, and it adapts punctuation and tone to the task. Set the level first, then judge the text it produces.
Voiskey learns names, jargon, acronyms, and spelling preferences as you correct its output, and a clean input level gives those corrections a consistent target. Speak the name at the same distance each time during the first few passes. Once the level and distance are steady, repeated corrections tend to settle faster than they do in a noisy, shifting setup.
Record a baseline first: speak one fixed phrase at your normal distance, note the peak level, and repeat it three times. Then change one control at a time and retest the same phrase. Bring that sheet to Voiskey so you can compare polished output against a known starting point instead of guessing.


 Voiskey
Your voice, amplified.
Download Voiskey for Mac and Windows and dictate with a steady, well-tuned input level.
Use it across macOS, Windows, iOS, and Android