
From Lecture Recording to Structured Outline
Replay the lecture, speak the skeleton, and leave with an outline that holds
 Voiskey Team
Choosing What the Lecture Must Yield
From Lecture Recording to Structured Outline is a conversion job with a clear product at the end: a skeleton of headings, claims, examples, and open questions that you can study from. Before replaying anything, decide what the outline must contain. Most lectures yield a main argument, two or three supporting points, a set of examples, and a short list of terms. Write those categories at the top of a blank document. This decision prevents the common failure where an hour of replay produces a dense page of quotations but no structure. The outline is a map, not a transcript, and naming the categories first keeps the map small.
Set a budget for the conversion. A fifty-minute lecture should become a one-page outline in roughly thirty minutes, including one replay of the difficult sections. If the budget is unclear, the replay expands to fill the evening and the outline never gets finished. Decide in advance how many times you will listen to each section: once for the overall shape, once for details you missed, and no more unless a specific question remains. A fixed budget forces you to choose what matters, and that choice is itself a form of learning. The outline reflects your judgment about the lecture, not a complete record of everything said.
Identify the parts of the lecture that need careful replay. Introductions and conclusions usually contain the argument and are worth hearing twice; long anecdotes usually are not. Mark the moments where the speaker signals importance, such as a repeated phrase, a summary slide, or a direct statement about what will be examined. Those signals tell you where the outline needs detail and where a single line is enough. A short list of timestamps, written before the replay, turns the session into a targeted task rather than a passive listen-through. The list also gives you a stopping condition, which is the difference between a finished outline and an endless review.
Check the source quality before committing to the conversion. If the lecture recording is unclear, incomplete, or missing sections, the outline will inherit those gaps. Note the gaps at the top of the document and decide whether a reading, a classmate's notes, or a tutorial can fill them. Do not quietly smooth over a gap with confident-sounding text; mark it as missing and return to it later. An outline that honestly shows what the lecture did not cover is more useful than one that appears complete. The goal of this first stage is a realistic plan, not a perfect source.
Listening Back Without Typing
The second stage is listening, and the discipline is to keep your hands still. Typing while listening splits attention between the speaker and the keyboard, and the resulting notes are usually a partial transcription with no structure. Instead, listen to a section, pause, look away, and say what it contained. Speak the heading first, then the claim, then one example, then anything you did not understand. The pause is where the work happens, because you are reconstructing meaning rather than copying sound. This is slower per minute of lecture but far faster per useful note, and it produces text you can actually study.
Replay in segments that match the lecture's own structure. Most talks move through three to five main sections, so treat each section as one listening unit. After the first pass, say the section heading and the main claim in a single sentence. After the second pass, add the supporting example and any term you need to define. Stop when the section is represented in the outline, not when you have heard every sentence. This segment-based method keeps the outline parallel to the lecture's logic, which makes it easy to see when the speaker shifted from evidence to interpretation or from one case to another.
Capture the speaker's signposting as structure. Phrases such as the first reason, on the other hand, and to summarize are direct instructions about the outline's shape. Say them into the document as headings or transition lines rather than leaving them buried in prose. When the speaker compares two positions, speak both sides in order and name the difference. When the speaker gives a list, speak the list as a list. The outline should reproduce the argument's architecture, and the speaker often provides that architecture in plain language. Your job is to notice it and record it, not to invent a structure after the fact.
Keep a separate question list during the replay. Every time you cannot follow a step, say the question and move on rather than pausing the whole session to solve it. The question list protects the flow of the conversion and produces a targeted agenda for later. At the end of the replay, review the list and mark which questions the lecture answered elsewhere and which remain open. The open ones become reading tasks, tutorial questions, or points to raise in class. This separation keeps the outline clean and turns confusion into a concrete next action instead of a vague feeling of having missed something.
Drafting the Outline by Voice
Drafting is the stage where spoken text earns its place. Open the document that will hold the outline and speak the skeleton in order: the lecture title, the main claim, the section headings, and one line under each heading. Do not worry about wording yet; the goal is a complete frame. Speaking the frame is much faster than typing it, and it forces you to decide the order of the sections before you fill them in. A frame that can be spoken in five minutes is a frame you can revise in five minutes, which matters because the first structure is rarely the best one and you will want to change it more than once.
Use consistent spoken markers to keep the outline readable. Say heading, claim, example, term, and question before each kind of line, and let the formatting follow. This makes the document scannable and lets you move a block by finding its marker rather than reading the whole page. Keep each line short: a heading should be a few words, a claim one sentence, an example one line with a page or timestamp reference. If a line grows into a paragraph, that is a sign it belongs in a separate summary rather than in the outline itself. The outline stays useful only while it remains compact.
Fill the frame in passes rather than all at once. First speak every heading, then every main claim, then the examples, then the terms. Each pass is quick and lets you check the structure before adding detail. If a heading has no claim after the first pass, the lecture may not have supported that section, and the outline should say so. If a claim has no example, mark it for follow-up. Working in passes also keeps your voice steady, because each pass has a narrow purpose. The result is an outline built by deliberate layers instead of a single rushed monologue that is hard to correct.
Read the finished draft aloud from start to finish before leaving the stage. Listen for two problems: a heading whose claim does not match the lecture, and a jump between sections with no transition. Fix the first by checking the source, and the second by speaking a one-line bridge that states how the new section follows. A bridge is often missing from typed notes because it takes extra effort to type, but it is easy to speak and it is exactly what makes an outline feel coherent later. End the stage by saving the document with the lecture date and course code in the name.
Turning the Outline into Study Material
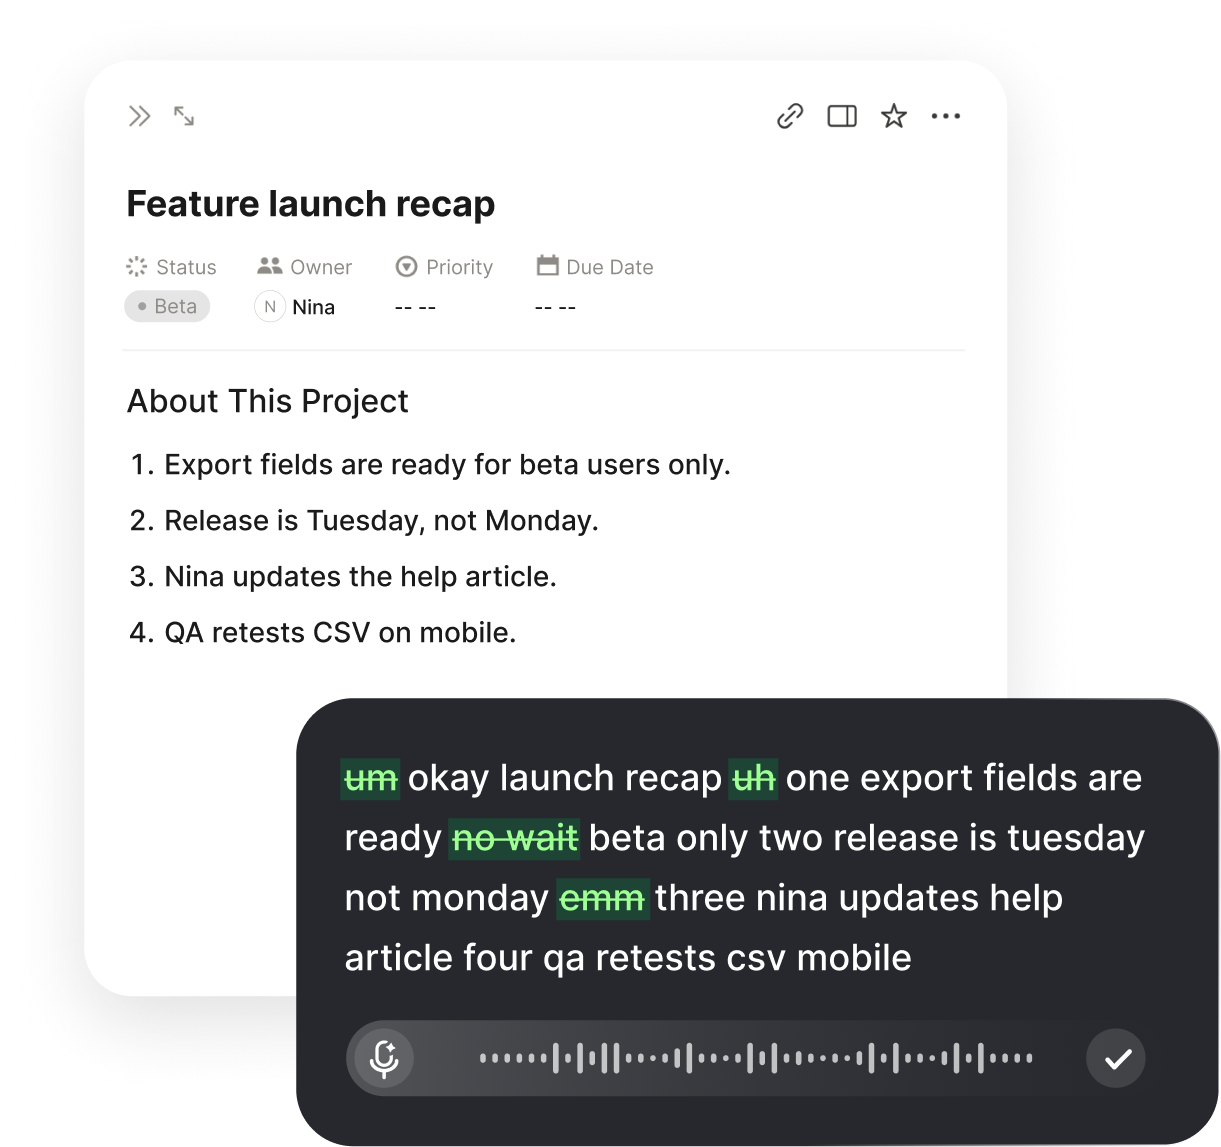
Voiskey helps at the point where the outline is drafted but not yet usable for revision. You press a shortcut, speak the section you want to expand, and text appears at the insertion point in the same document. Because it removes filler words and false starts and adapts punctuation and formatting to what you are doing, the expanded notes keep the outline's shape instead of turning into a loose transcript. The workflow is Speak-Polish-Type-Edit: speak the explanation, polish the result, type the precise references, then edit against the source. Keeping everything in one document means the outline and its expansion never drift apart.
When you download Voiskey, set up a simple two-column habit in your notes document: the left side holds the outline, the right side holds the spoken expansion. After each section, speak a two-sentence explanation that a classmate could follow without the lecture. Then convert the explanation into a question and place it under the heading as a retrieval prompt. This turns a passive outline into active study material. The prompts are short, specific, and traceable to the lecture, which is exactly what you need before a tutorial or an exam. The two-column layout also makes gaps visible at a glance.
Add the missing layers that an outline does not capture on its own. Speak a short definition for each term, one sentence on why the example matters, and one sentence on where the argument could be challenged. These three additions are usually what separates a summary from an understanding. Keep them brief and keep them next to the relevant heading. If you cannot say why an example matters, the outline has recorded a fact without connecting it to the claim, and that is worth flagging. The goal is not more text; it is a small number of sentences that make each heading answerable.
Finish by testing the material against the lecture's own questions. Cover the expansion and answer each prompt from memory, then check the source. Mark the prompts you answered cleanly, the ones you answered partially, and the ones you could not answer at all. The partially answered prompts are the highest-value study targets, because they sit at the edge of what you know. Put those at the top of the next session's plan and leave the clean ones for a quick review. A structured outline is only useful if it leads to this kind of testing, and the spoken expansion makes the testing possible without a second pass through the whole lecture.
Reusing the Outline Across the Term
An outline becomes more valuable when it connects to the rest of the course. After a few weeks, you will have several lecture outlines that cover related material. Merge them into a course-level map with the main topics as top-level headings and the individual lectures as subheadings. Speak the connections between lectures, such as a concept that returns in a later week or a method introduced early and applied later. These connections are difficult to see inside a single lecture and easy to miss when notes are kept as separate files. Voiskey makes the merge quick because you can speak the links directly into the map.
Keep the outlines consistent so they can be compared. Use the same headings, the same marker labels, and the same placement for questions. When you add a new lecture, follow the existing template rather than inventing a new format. Consistency is what allows you to scan a term's worth of outlines and spot a topic that keeps appearing without a clear explanation. It also makes it possible to hand the map to a study partner who can navigate it without instructions. A shared format is a small investment that pays back every time you revise. A little consistency now saves a lot of confusion during revision week.
Revise the outlines rather than replacing them. When a later lecture corrects or extends an earlier claim, edit the earlier outline and add a line noting the update and its source. This preserves the record of how your understanding changed and prevents you from studying an outdated claim. Download Voiskey and keep the shortcut available during revision sessions, so updating an outline is as easy as speaking the correction into the right heading. The habit of revising in place keeps the course map current and turns a pile of lecture notes into a single, coherent document you can trust, revisit, and extend as the course grows.
Before an assessment, read the course map rather than every outline. Start at the top level, say the main topic aloud, and list the lectures that support it. Then open only the outlines for topics you cannot summarize confidently. This triage saves time and directs effort to the weakest areas. Keep the question lists from all outlines in one place so you can see which ones recur across lectures; recurring questions usually point to a conceptual gap rather than a missing fact. End each revision cycle by speaking one sentence about what you now understand that you did not before, and add it to the map.
FAQ s
You replay the lecture, pause at each section, and speak the heading, claim, and example into a document. Voiskey removes filler words and false starts and adapts punctuation, so the spoken skeleton becomes readable text that you can arrange into an outline.
Yes. Voiskey is designed to remove filler words, stutters, and self-corrections, and it adapts formatting to what you are doing. If you speak consistent markers such as heading, claim, and example, the text that appears at the insertion point stays structured and easier to scan as an outline.
No. Voiskey works at the system level, so you press a shortcut and speak, and text appears at the insertion point in any app or text field. You can build the outline in the notes document you already use, without copying text between tools.
Decide what the outline must contain before replaying anything, such as the main claim, supporting points, examples, and open questions. Then open your notes document, place the insertion point, press the shortcut, and speak the headings in order so the frame exists before you add detail.


 Voiskey
Your voice, amplified.
Download Voiskey for Mac and Windows and turn lecture replays into clean outlines.
Use it across macOS, Windows, iOS, and Android